
You are using an out of date browser. It may not display this or other websites correctly.
You should upgrade or use an alternative browser.
You should upgrade or use an alternative browser.
PROJECT VR6 install Supercharger M90 thunderbird With Video
- Thread starter stroker6pack
- Start date
stroker6pack
New member
the chains stretch no dought..when i did a friends chains.. motor had about 200 xxxkm and the old chain was just over half a link longer then the new.. and both guides where broken..
just imagine where this plastic goes jeez such a bad design
Yes a bad design you're right, I got 105000 Miles on the motor and I compared the chains, they were exactly the same.
FranksGTP
Legacy Member
I did a lot of research before starting, It is very hard to find other info or pics on Supercharger porting. I did what I think was good and on what info & pics I found on the net.
The next best thing to do on mine is to replace the rotor pack with a Gen-3 GM which have a epoxy coating on them. But I will wait to try the set up first and make sure all is good, then we'll see...
Glad you already know about the coater rotors, some guys swear it makes a big difference. I think you'd be hardpressed to find a site better than club gp for GM S/C info tho... Worth checking out... Still trying to find my pics and notes from when I did my job, although I could have sworn that I posted them in the domestic section....
stroker6pack
New member
Glad you already know about the coater rotors, some guys swear it makes a big difference. I think you'd be hardpressed to find a site better than club gp for GM S/C info tho... Worth checking out... Still trying to find my pics and notes from when I did my job, although I could have sworn that I posted them in the domestic section....
I got some info from clubgm.com, but I tried to find it but it's like they removed it???
There was a section for Mods 3800 series-2...all gone??
Are you driving a GP or Regal supercharged?
SilverBullet006
Legacy Member
Upgrade your OEM Timimng chain parts that are obviously OBD I to the newer all plastic tensioner like in the OBD II VR6.
No more rivited composite material that can break off and chain chatter.
You will want to keep your Dual chain Camshaft Sprokets from the OBD I in order to use OBD I timing chain, as it is much better and quieter than the single chain found in OBD II.
No more rivited composite material that can break off and chain chatter.
You will want to keep your Dual chain Camshaft Sprokets from the OBD I in order to use OBD I timing chain, as it is much better and quieter than the single chain found in OBD II.
stroker6pack
New member
Upgrade your OEM Timimng chain parts that are obviously OBD I to the newer all plastic tensioner like in the OBD II VR6.
No more rivited composite material that can break off and chain chatter.
You will want to keep your Dual chain Camshaft Sprokets from the OBD I in order to use OBD I timing chain, as it is much better and quieter than the single chain found in OBD II.
I have replace with the new updated tensioner & plastic guide not metal.....just to let you know I have OBD-II with double chain, it depends on what year built, I believe 97 and up is a single chain..
stroker6pack
New member
If anybody knows where I can buy 3 inch aluminum pipe or tube about 4mm thich or 1/8 inch here in Mtl plz let me know........Thanks
Teknojnky
Moderator
Try Métaux Solutions http://www.metauxsolutions.com/
They are at 32nd and Cote de Liesse in Lachie/Dorval
I've been there many times, you walk in, tell them what you want, the lenght and so on.
They are at 32nd and Cote de Liesse in Lachie/Dorval
I've been there many times, you walk in, tell them what you want, the lenght and so on.
T5shortblock
Well-known member
nice project!
stroker6pack
New member
Try Métaux Solutions http://www.metauxsolutions.com/
They are at 32nd and Cote de Liesse in Lachie/Dorval
I've been there many times, you walk in, tell them what you want, the lenght and so on.
OK thanks, I'll give them a call tomorrow.
stroker6pack
New member
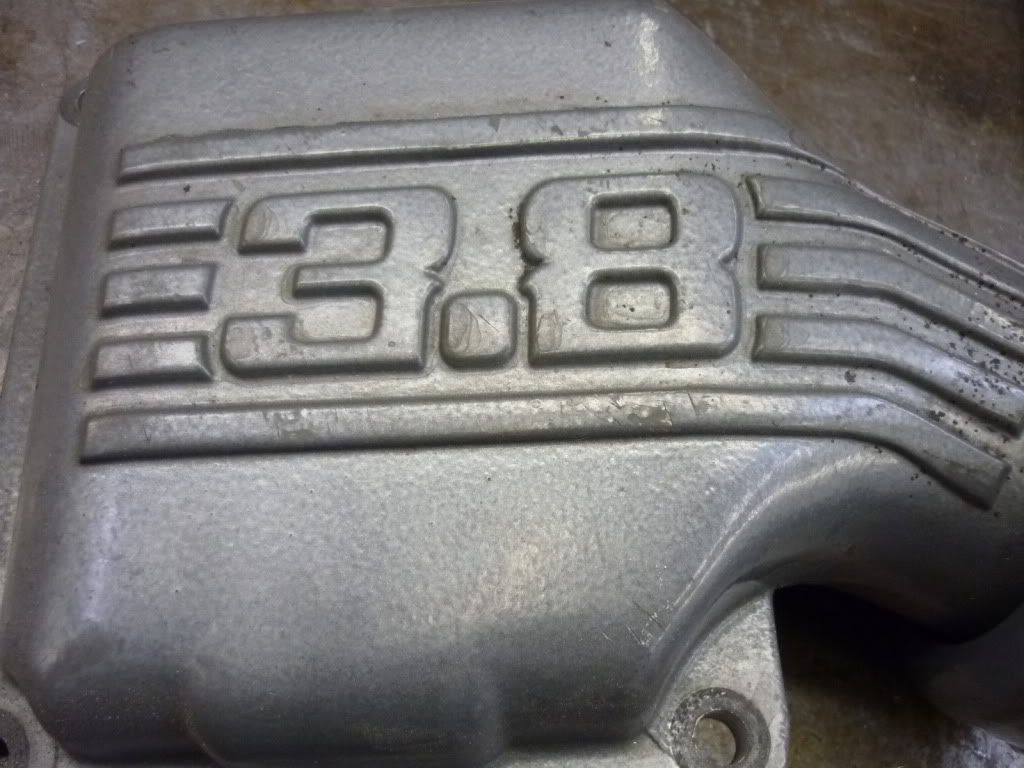
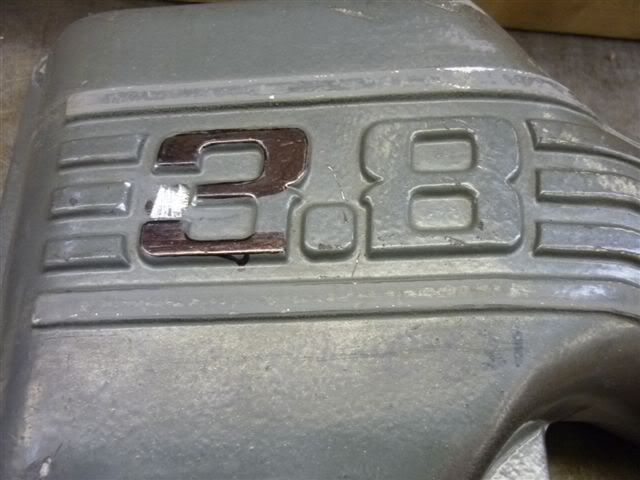
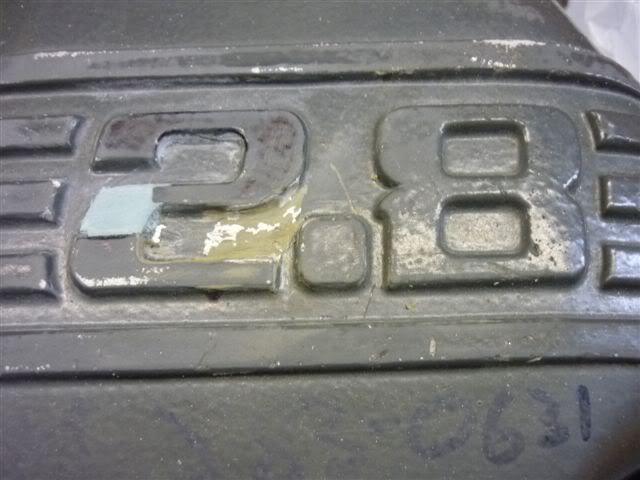
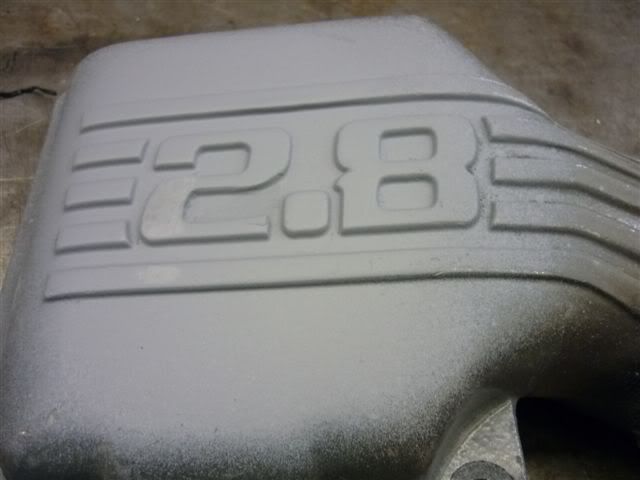
Since the Supercharger comes from a Ford 3.8, as you can see in the pictures this is the hat or outlet part of the supercharger, I decided to make it a 2.8 to match the VR6.
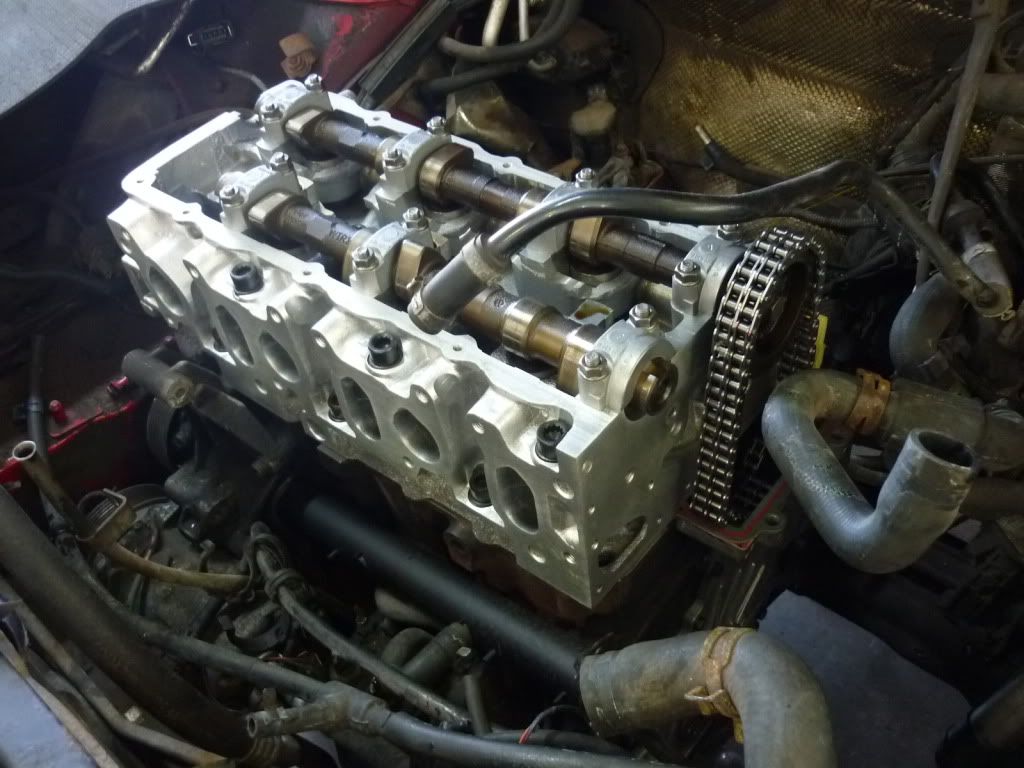
So now the new head and chain kit is in place
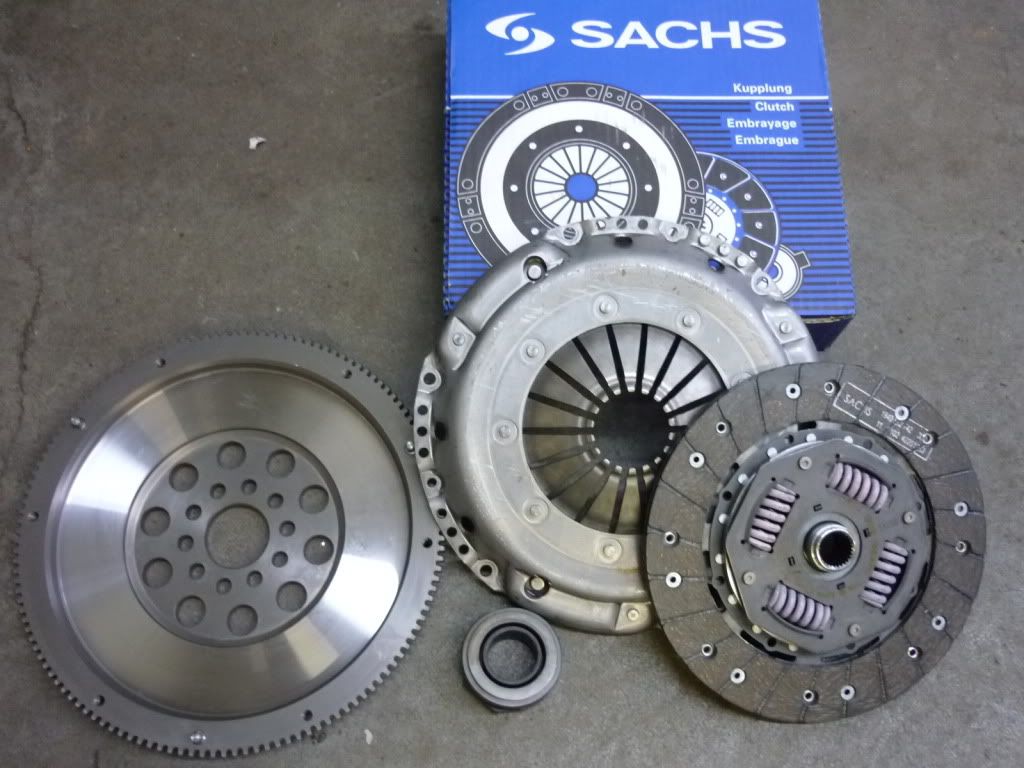
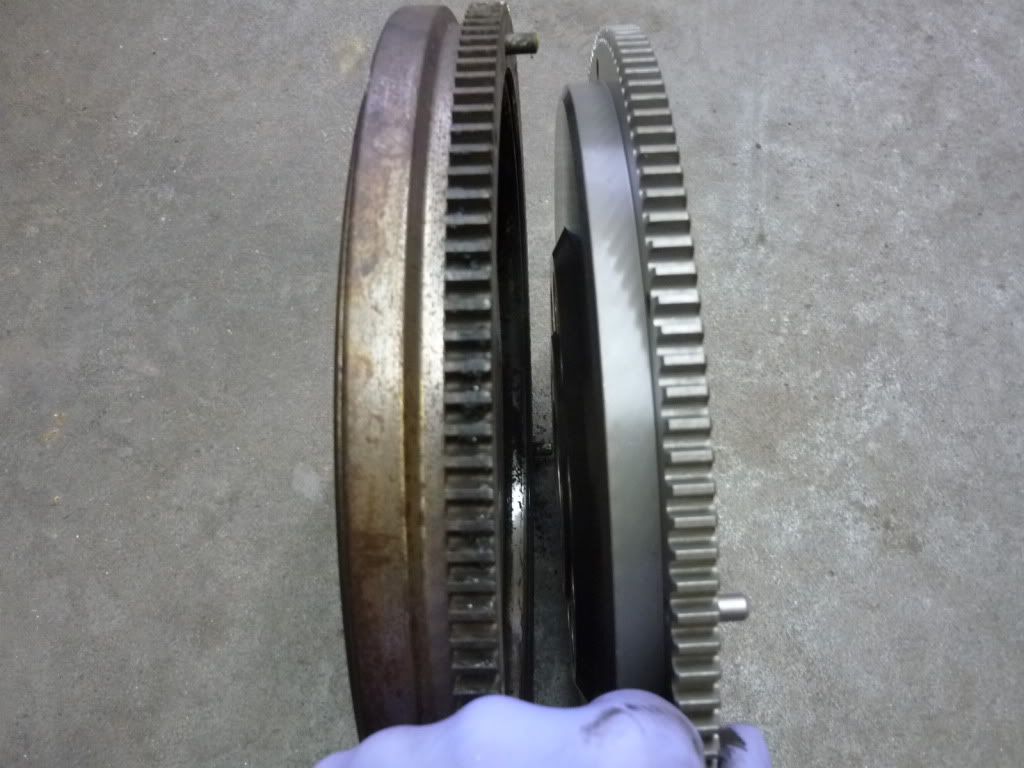
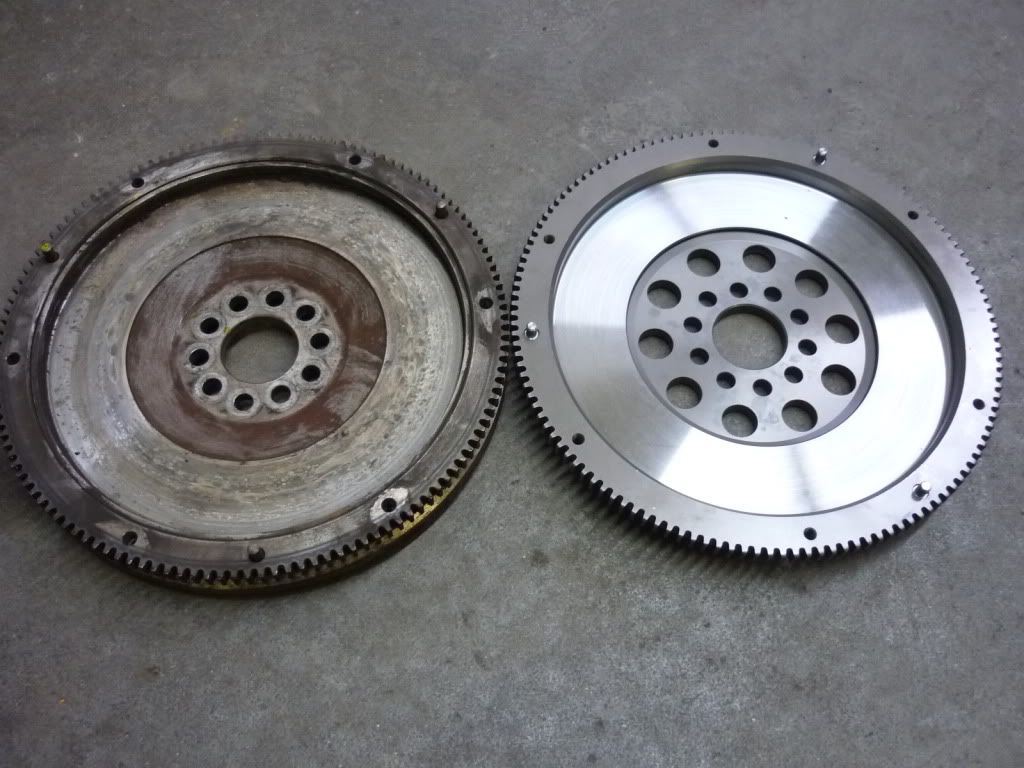
At this point, why not replace the clutch also!! So I installed a new clutch Sachs and decided on a lightweight flywheel at 10 lbs. See the difference in pictures.
So now the new head and chain kit is in place
At this point, why not replace the clutch also!! So I installed a new clutch Sachs and decided on a lightweight flywheel at 10 lbs. See the difference in pictures.
stroker6pack
New member
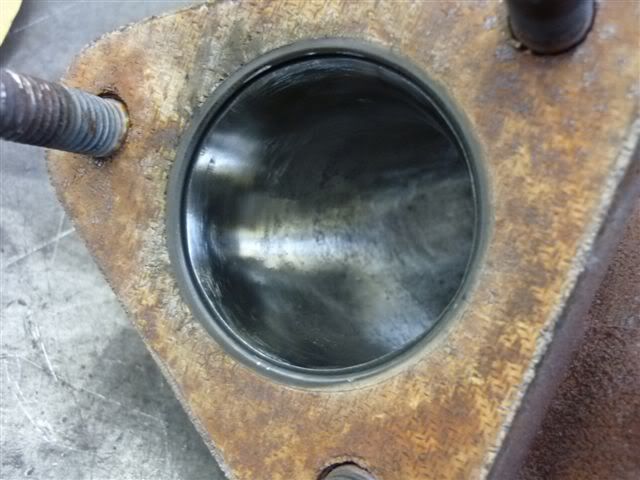
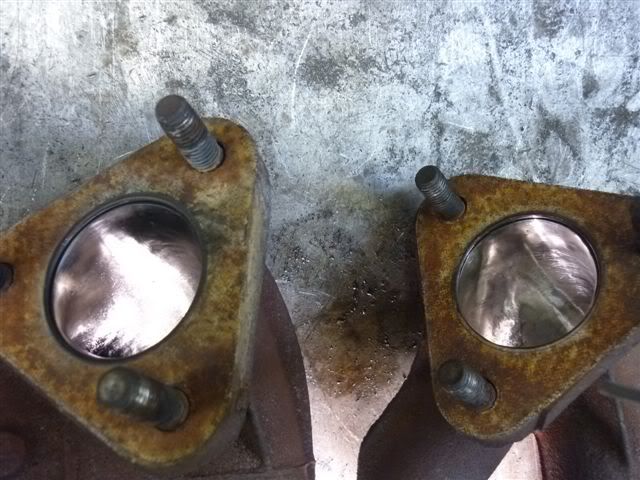
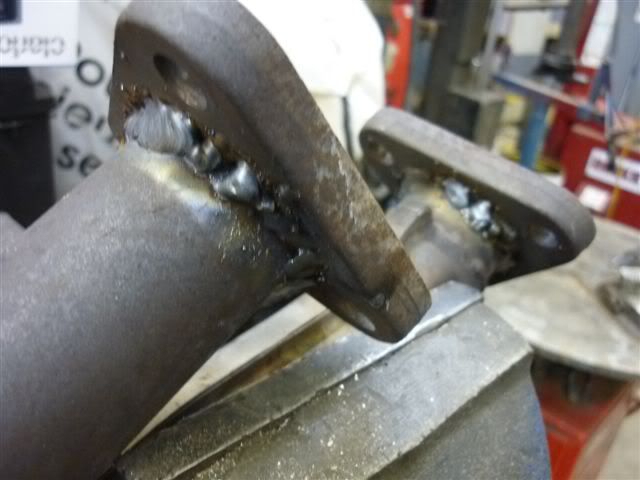
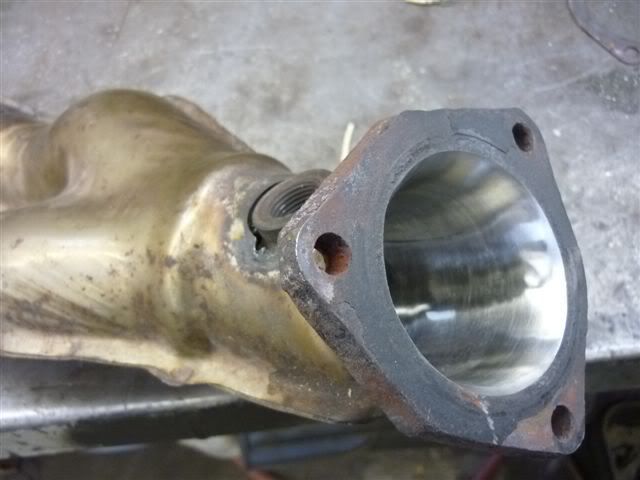
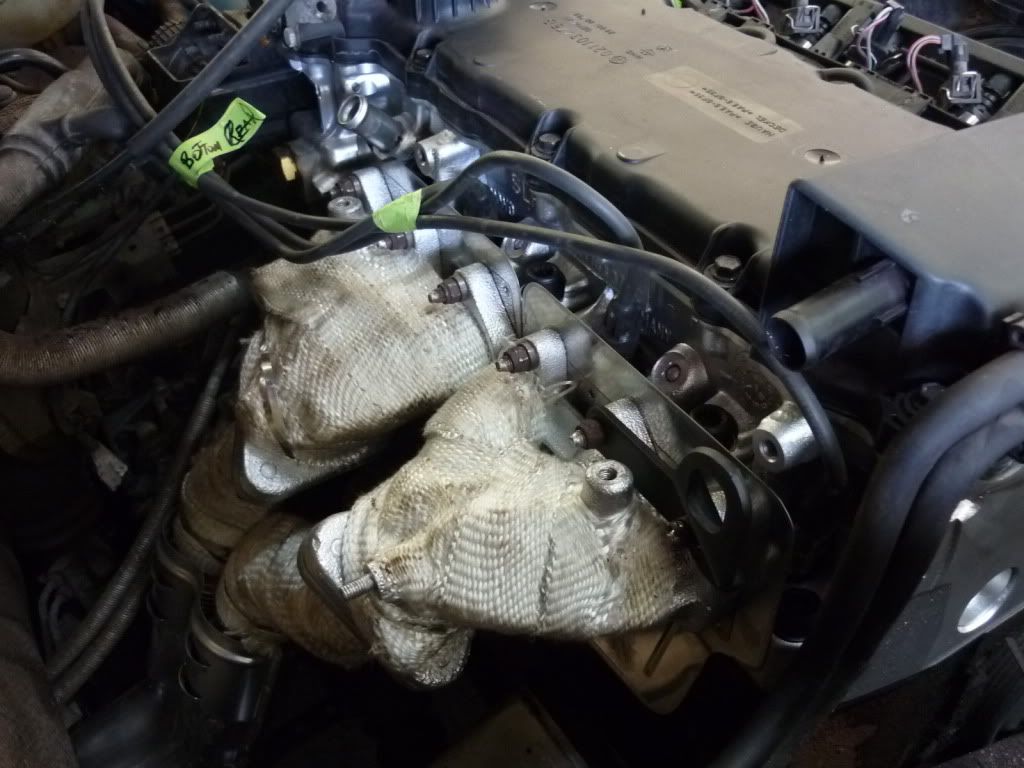
Headers or Manifolds??? One question that I never found a straight answer. Most I found was port the manifolds and they should be as good as headers....so that's exactly what I did. And also the downpipe , all gasket matched ported and polished.
BEFORE
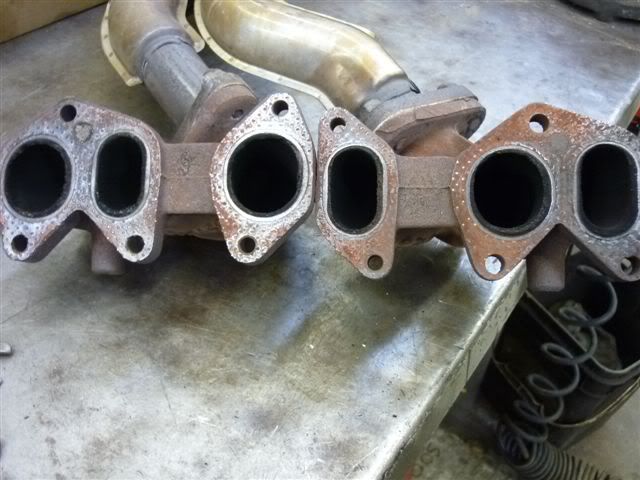
AFTER
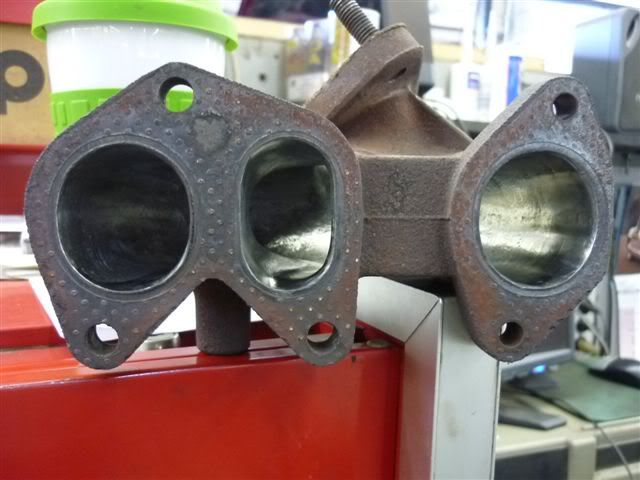
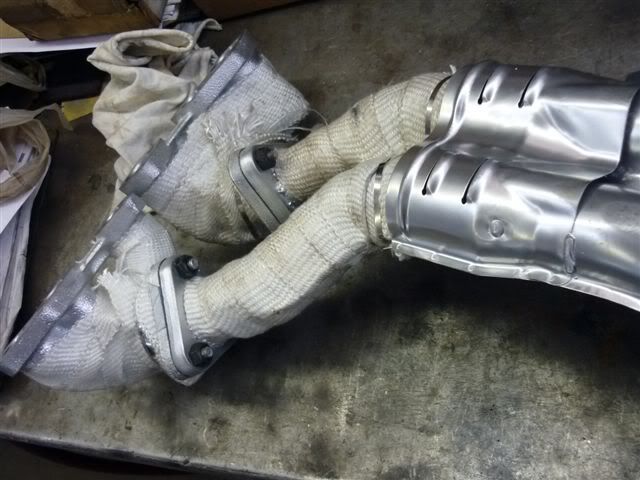
FOR THE DOWNPIPE DON'T FORGET TO WELD THE OUTER FLANGE
You can see the top one has been ported to compare

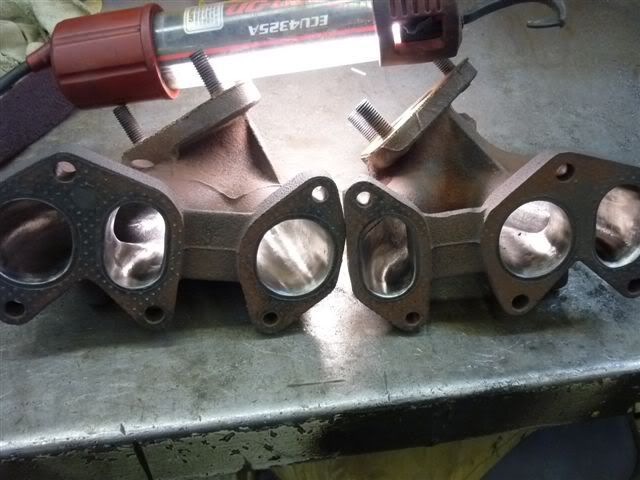
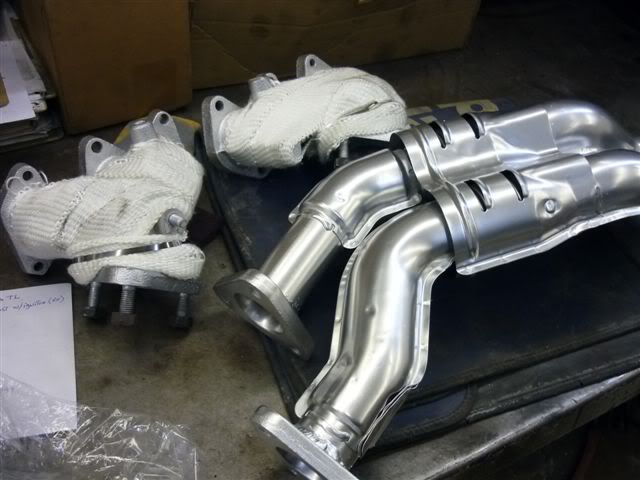
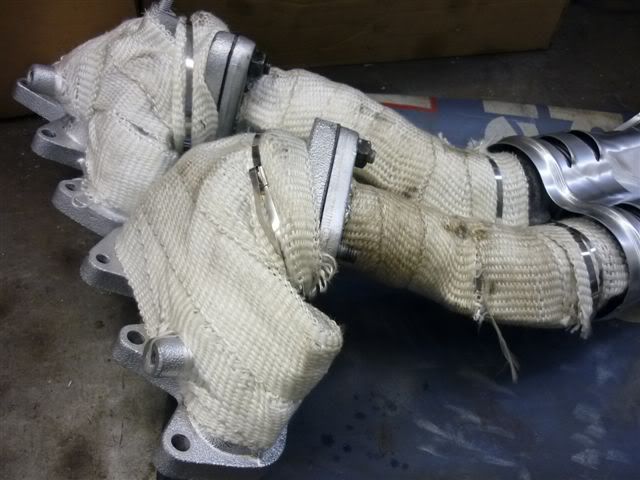
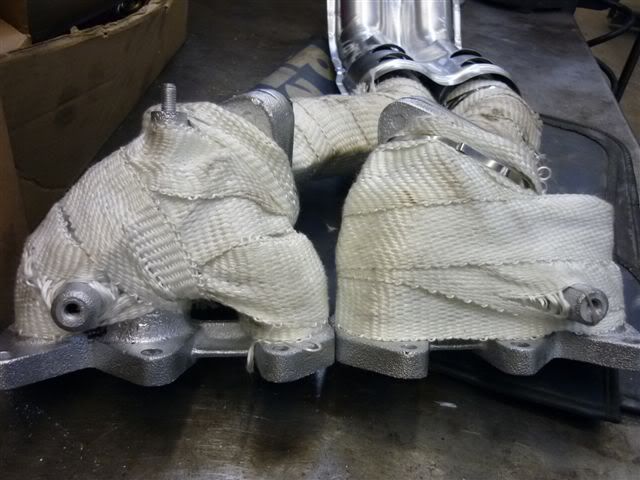
I decided to install heat wrap on the manifolds since the supercharger will sit on the exhaust manifold, try to keep the heat down as much as possible.
BEFORE
AFTER
FOR THE DOWNPIPE DON'T FORGET TO WELD THE OUTER FLANGE
You can see the top one has been ported to compare
I decided to install heat wrap on the manifolds since the supercharger will sit on the exhaust manifold, try to keep the heat down as much as possible.
Last edited:
stroker6pack
New member
Last edited:
 nice work
stroker6pack
New member
Awsome build, I have a Vortec SC on my vr and its fun as hell!!!
How much boost are you running?
Any problems with engine pinging or heat ?